Making objects movable in Performance: step by step
4 min read
- Professional
- Desktop
In Halocline, you can configure objects so that they can be moved and used in Halocline Performance. Whether it’s assembly carts, individual drawers, or nested structures – with movement restrictions you define what can be shifted, opened, or transported along. The following steps give you practical guidance on how to enable objects to move in Halocline, restrict movement axes, and use grouping to your advantage.
|
A Quick Tip for Faster Selection Select Volume#In the Selection tool: Hold the trigger and draw a blue selection box. All elements touched by the blue box will be selected. |
Example 1: Making an Entire Object Movable#
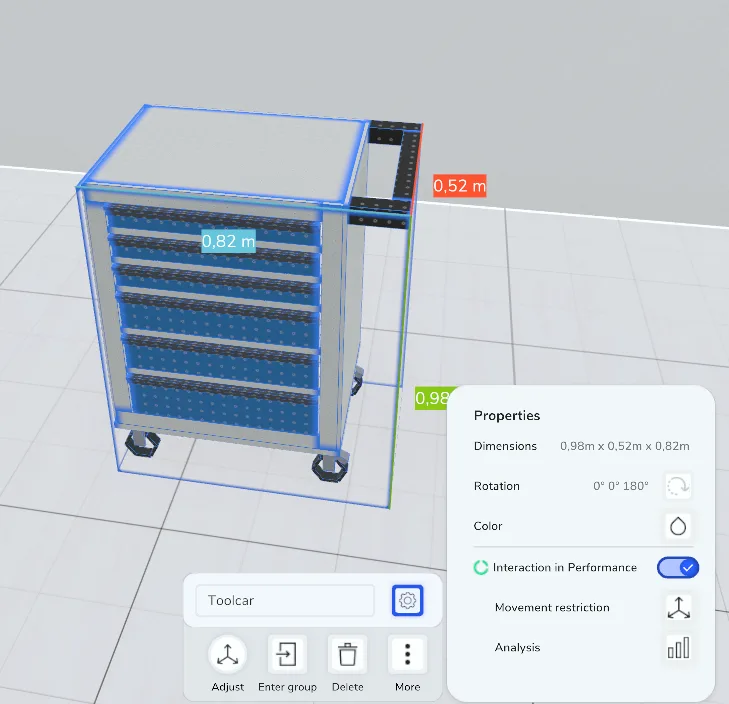
Example: A tool cart should be moved in VR.
- Select the object (e.g. tool cart)
- Click on the object’s settings in the context menu
- Enable Interaction in Performance
→ The object is now movable in Performance
Result: The tool cart can now be moved freely in Performance.
A reasonable axis-based movement constraints would be to deactivate the z-axis (green). This way, the cart can only move on the floor.
Example 2: Enabling a Subgroup to Move#
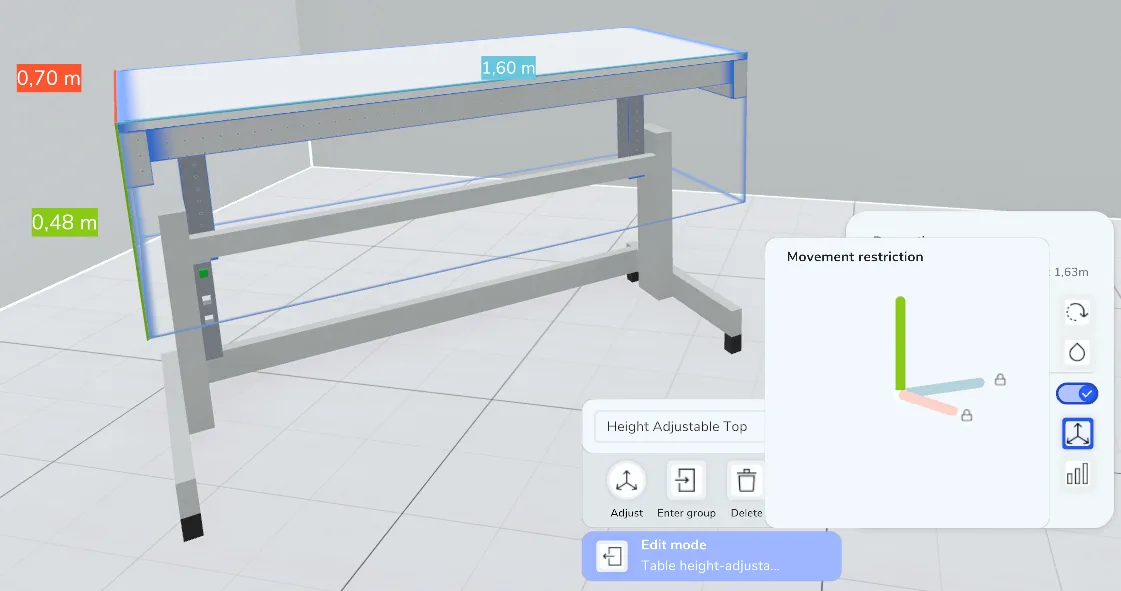
Example: The top part of a table should be movable while the rest remains fixed.
- Select the object (e.g. height-adjustable table)
- Enter group to access components individually
- Use Select to specifically mark all desired boxes
- Group them
- Click on the settings of the new group in the context menu
- Enable Interaction in Performance
→ The group is now movable in Performance
Result: Only the top part of the table is movable, while the rest remains stationary in Performance.
A reasonable axis-based movement constraint would be to deactivate the x-axis (red) and y-axis (blue).
Example 3: Co-Moving Objects#
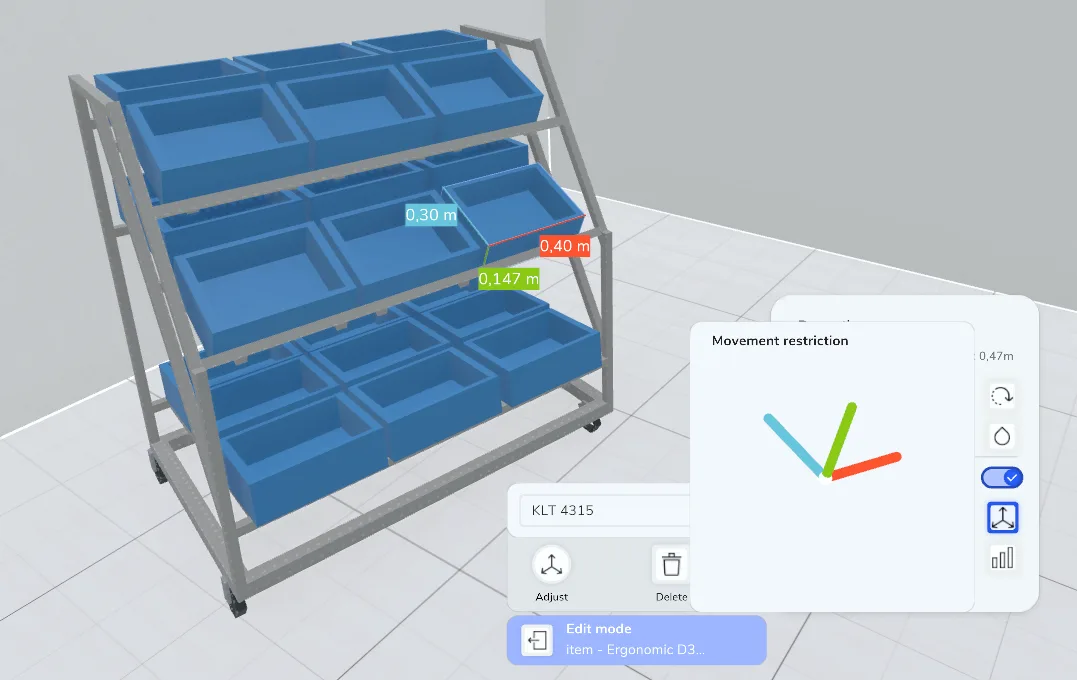
Example: A material cart in which containers are transported along.
- Select the object (e.g. material cart)
- Click on the object’s settings in the context menu
- Enable Interaction in Performance
→ The entire object is now movable in Performance - Enter group to make containers, components, or parts individually movable
- Select the components that should be movable
- Click on the settings of the selection in the context menu
- Enable Interaction in Performance
→ The selected components are now movable in Performance
Result: When you move the material cart, the contained containers move along. Additionally, you can remove individual containers from the cart.
Note: Components that only collide by chance will not move along – only objects belonging to the movable group, like the material cart.
Example 4: Nested Movability#
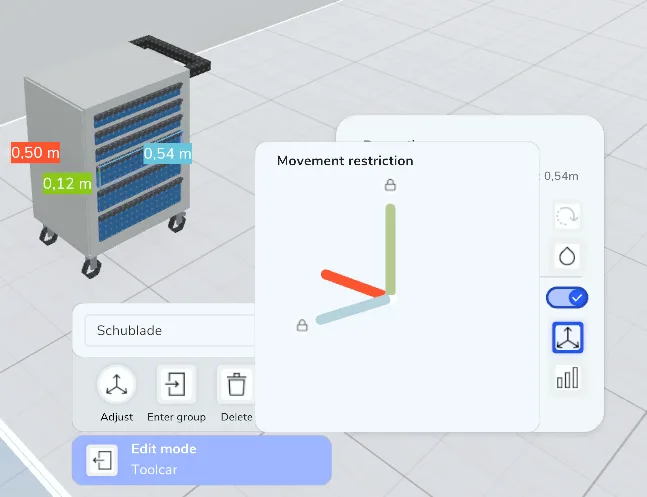
Example: A mobile tool cart contains a drawer that can additionally be opened.
- Select the object (e.g. tool cart)
- Click on the object’s settings in the context menu
- Enable Interaction in Performance
→ The object is now movable in Performance
(as in Example 1) - Enter group to access components individually
- Use Select to specifically mark all boxes to be moved
- Group them – this creates the drawer
- Click on the settings of the new group in the context menu
- Enable Interaction in Performance
→ The group is now movable in Performance
Result: The tool cart as well as the drawer can now be moved in Performance. The drawer moves along with the cart.
Reasonable axis-based movement constraint for the drawer would be to deactivate the z-axis (green) and y-axis (blue). For the tool cart, it is recommended to deactivate the z-axis (green). This way, the cart only moves on the floor, and the drawer can only be pulled out in one direction.
Setting Up Axis-Based Movement Constraint#
Examples:
- Height-Adjustable Table: Only Vertical Movement
- Cart: Movement Only on One Plane (Floor)
- Drawer: Limited to Forward & Backward Movement
To set up axis-based movement restrictions for objects, proceed as follows:
- Select the object (also possible within groups)
- Click on the object’s settings in the context menu
- Enable Interaction in Performance
→ The object is now movable in Performance, if it wasn’t already - Click Movement Restrictions → Coordinate system appears
- Click on the axes you want to block → grayed out + lock appears
Result: Test in Performance whether the movement is only possible along the allowed axes.
Notes on Grouping and Movability in Performance#
- Clearly Structure Groups: A group consisting exclusively of individually movable objects cannot be moved as a whole. Make sure that at least one of the components is not individually movable.
- Use “Interaction in Performance” Selectively: First set all objects to “Interaction in Performance: off,” then group, and finally enable interaction – this way you prevent every element from remaining individually grabbable.
- Restructure Complex Structures if Necessary to ensure a clean movement logic. Especially after CAD import as boxes, make sure there are no overlapping boxes. Overlaps will prevent movement from working as intended. To fix this, dissolve the groups and select only what you really need.
Related to