Creating a shopfloor and dividing it into work areas
2 min read
- Desktop
Creation#
A shopfloor in Halocline represents a hall or a large section of a hall that you want to plan.
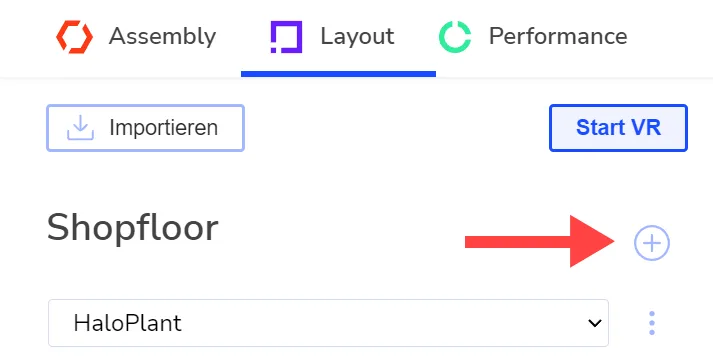
To start planning your shopfloor, click on the Layout tab in the Desktop view. Click on the plus symbol next to Shopfloor.
Configuration#
When you click on the plus icon, this window appears:
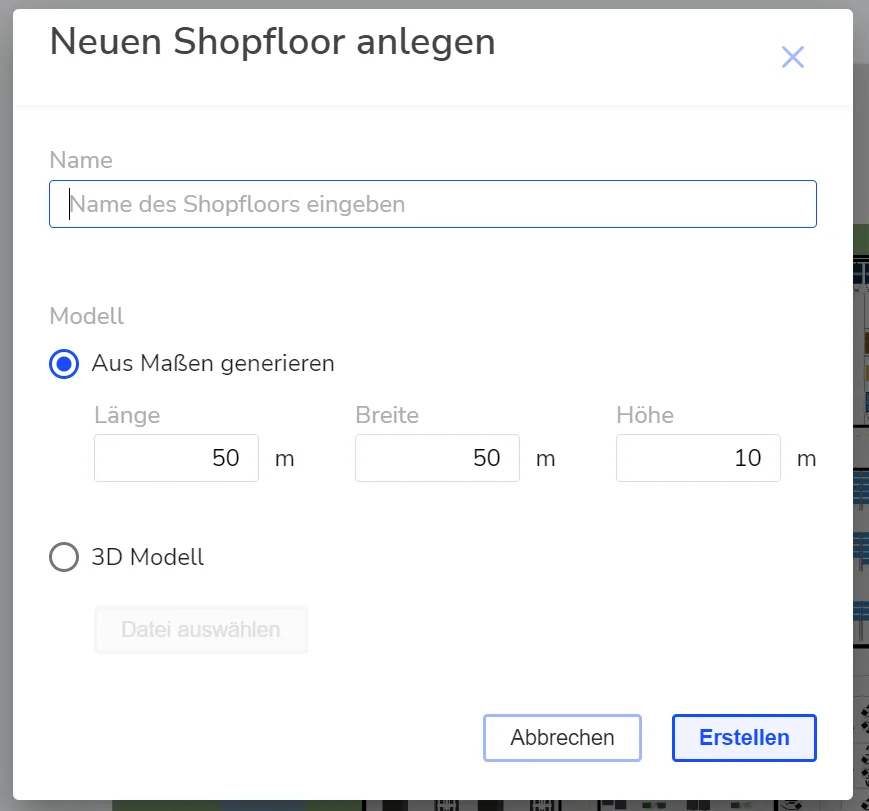
First, name your shopfloor with a unique name.
Then choose the model:
-
Generate from dimensions
- Select this option if you do not have a 3D model of your shop.
- Specify the size of the hall area you want to plan.
-
3D Model
- Select this option if you have a prepared 3D model of your hall.
- The hall must be in GLTF file format. You can find more information here.
- Alternatively, we are able to prepare a 3D model of your hall based on existing data. Feel free to contact us for further information.
You can change these settings at any time, so you don't have to wait for your 3D model to get started.
Create Work Area & Variants#
The shopfloor is automatically created with an empty workspace and a variant. If you are planning only a small workspace, you can start planning directly in VR. If you are planning a larger hall section, it makes sense to divide it into several work areas beforehand. This way you can make a rough planning in 2D and later create variants of individual areas.
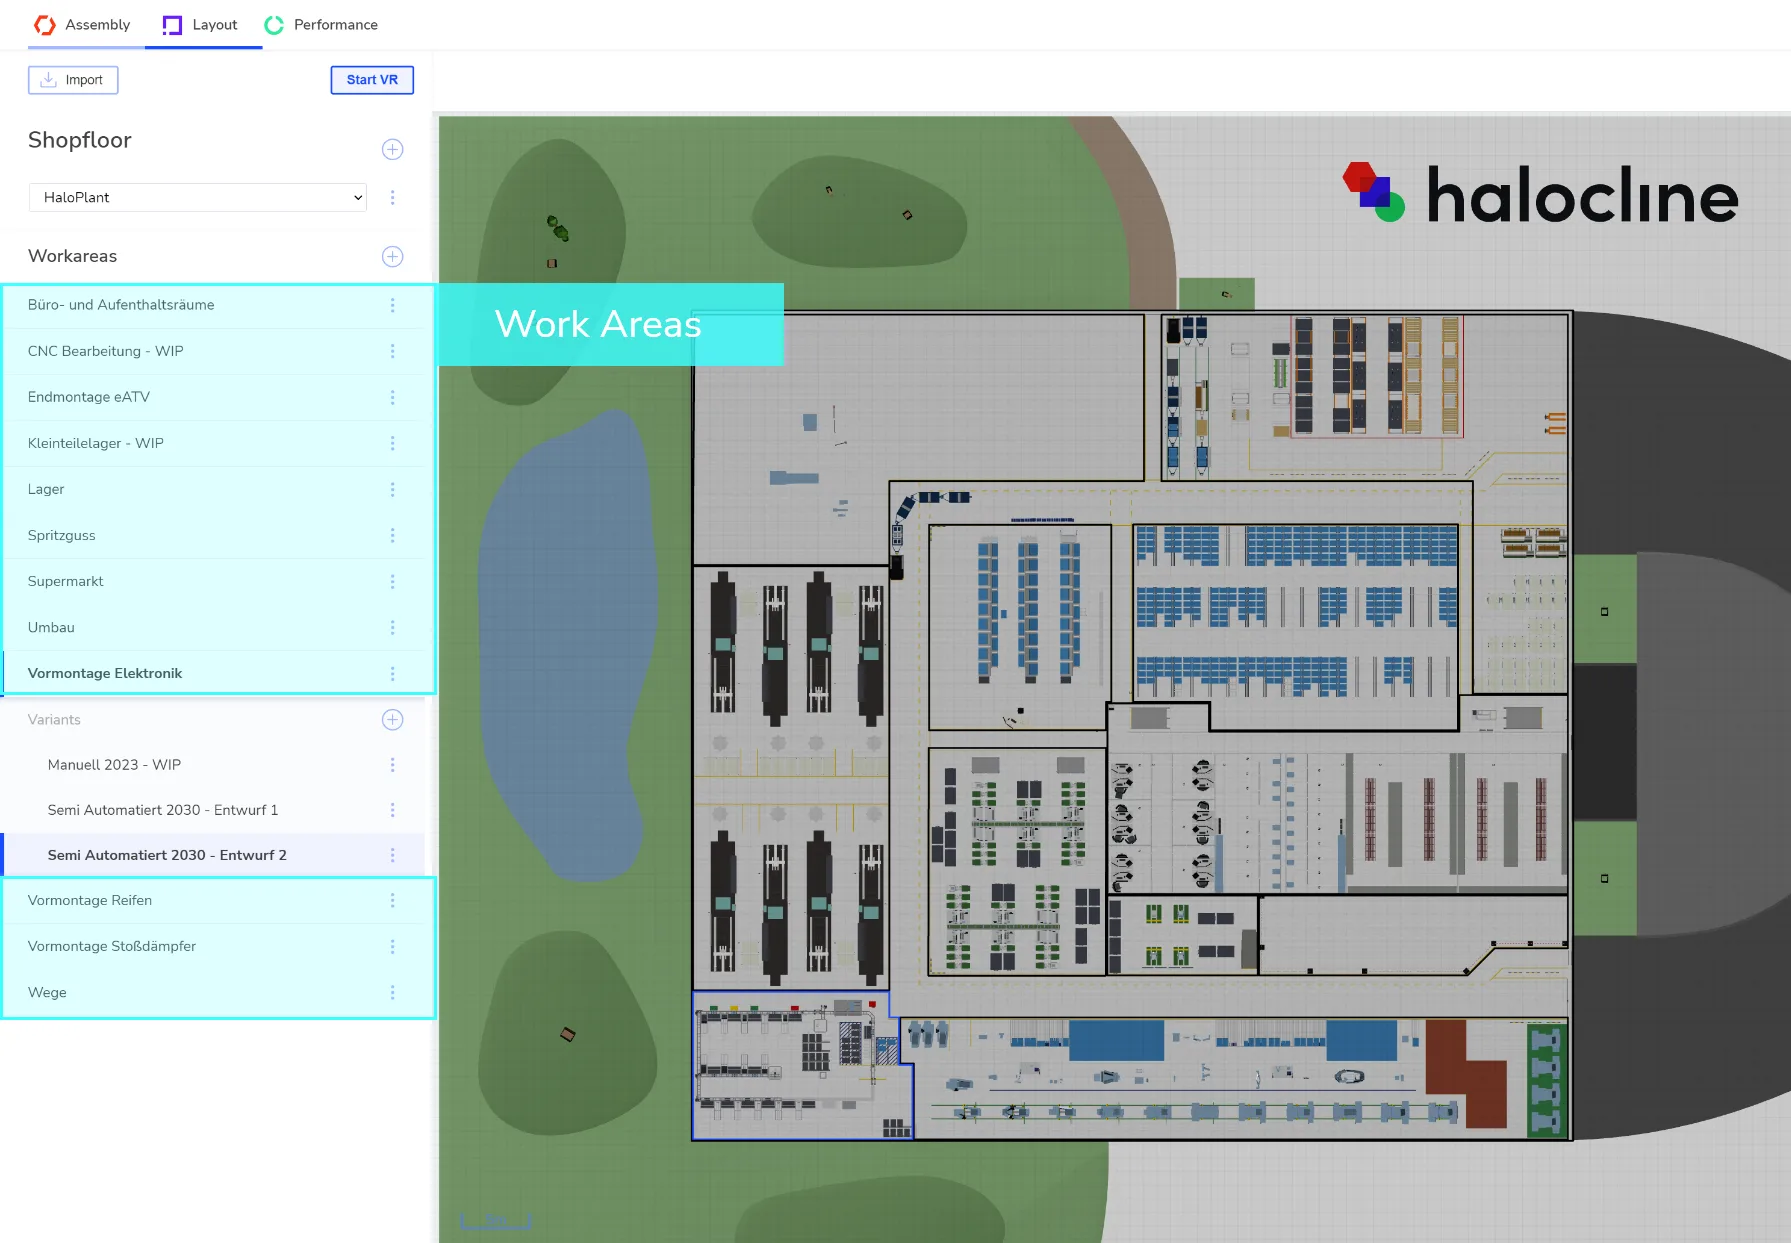
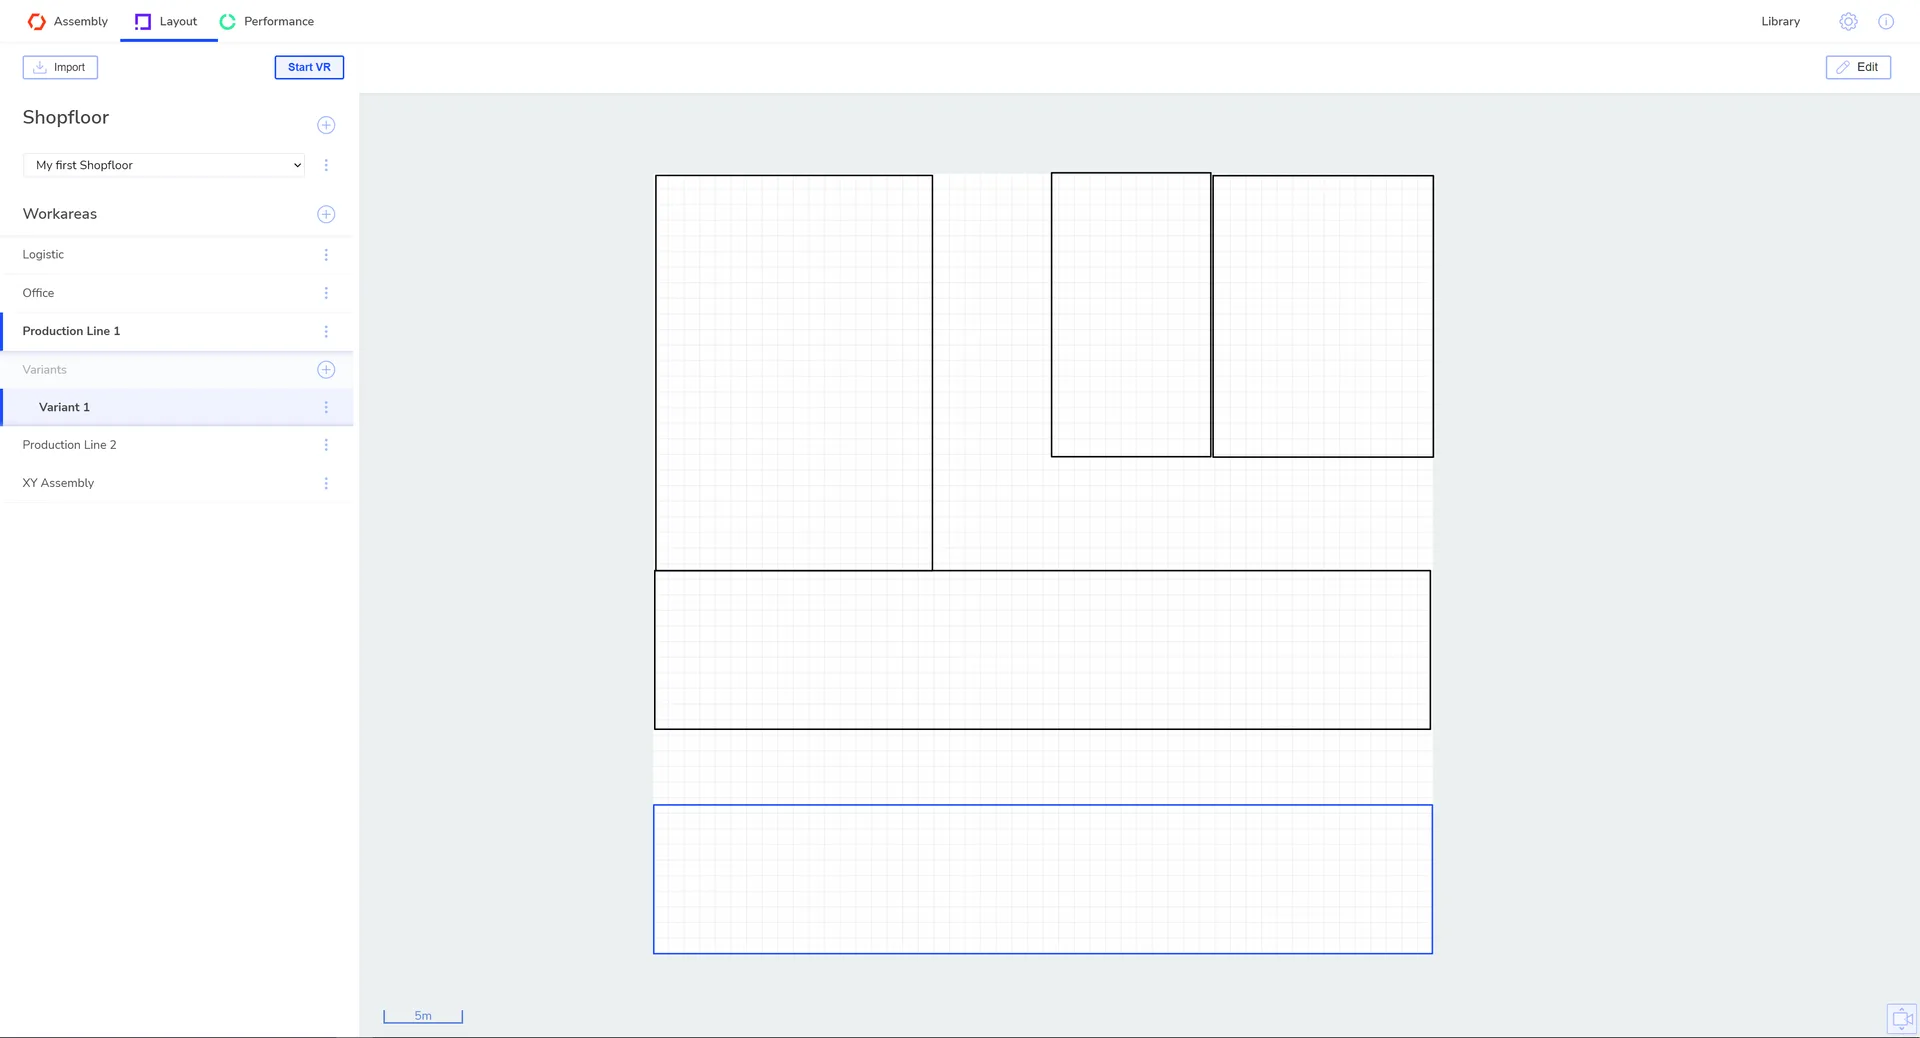
You can choose the division of the areas freely, for example by segments, production lines, responsibilities or cost centers. You can see an example in our demo shopfloor:
Create work areas#
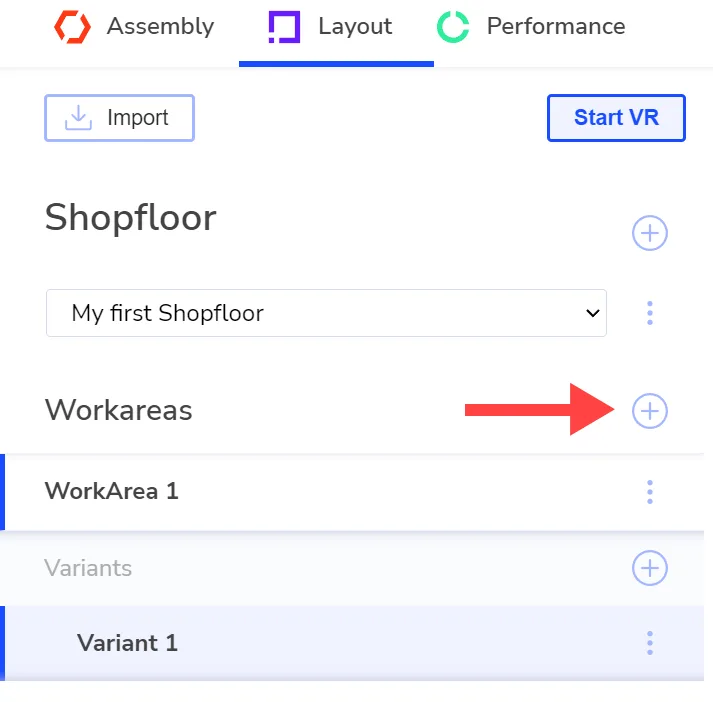
Click on the plus icon next to the Work areas heading. Give the work area a unique name.
Place variants of work areas#
For each work area a variant is automatically created. It is recommended to start planning with this variant before creating others. This way you can build them in VR first and then duplicate the variant with its content.
Place the variant to get a rough area plan. To do this, select the work area and click on Edit in the upper right corner.
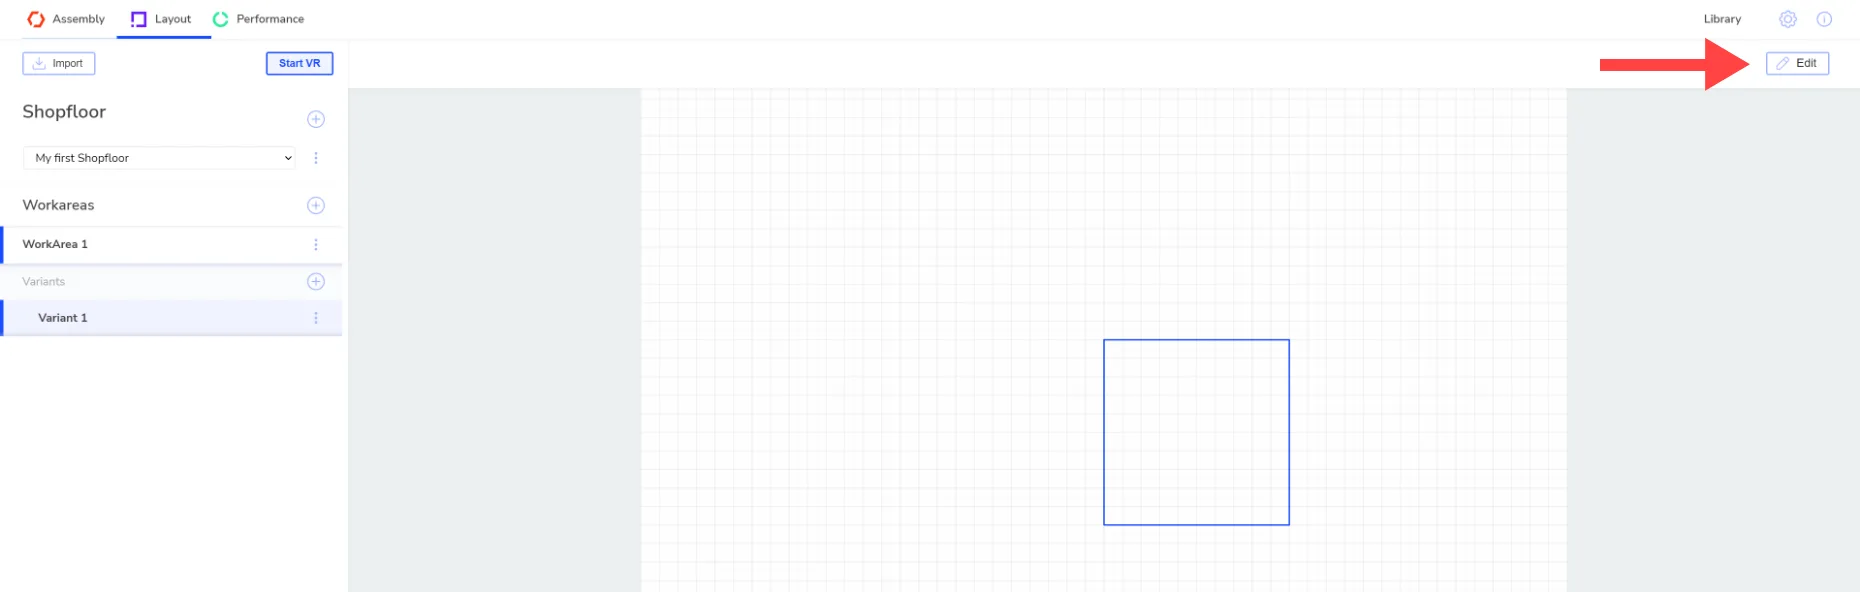
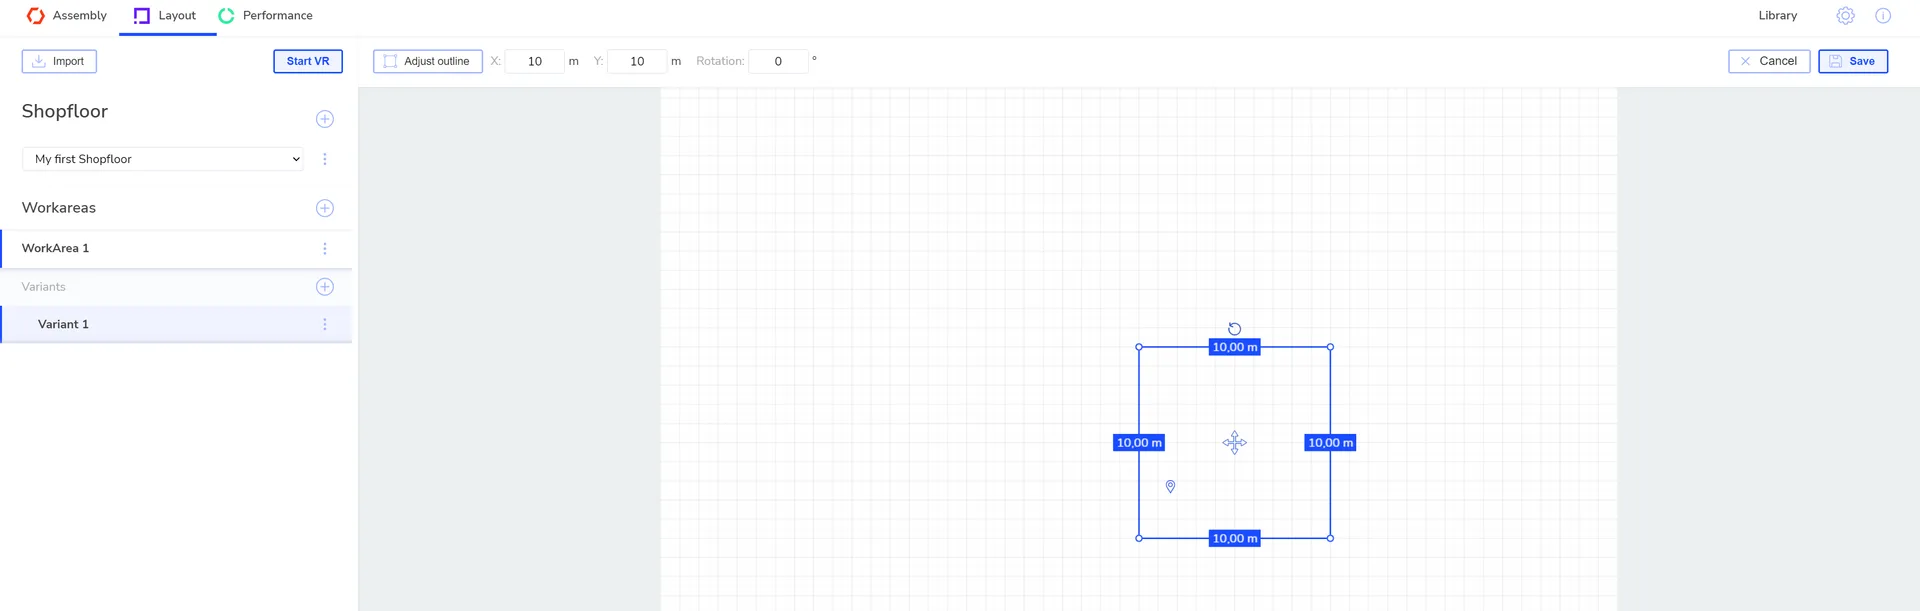
The outline of the variant is displayed as a blue rectangle in the preview. You can move and resize it in edit mode. Then click on Save.
After rough planning your variants, your shopfloor might look something like this:
You can find more detailed settings here: Edit variants in 2D
Using a 2D layout#
If you already have an existing 2D layout, you can insert it as a background. This makes it easier to draw in areas. See the article "Using existing 2D layouts" for more information.
Start VR#
Once your rough planning is created, you can select an area and start VR. Check out the article "Start Layout VR" to understand how to select work areas and variants and how to start them in VR.
Related to