Halocline Layout on the desktop: mouse and keyboard controls
2 min read
- Desktop
Function#
Desktop planning allows you to create and customize layouts with your mouse and keyboard. Work in 2D or 3D, place new objects, edit existing elements, add measurements and take screenshots. The functions are identical to VR mode.
Instructions#
Start#
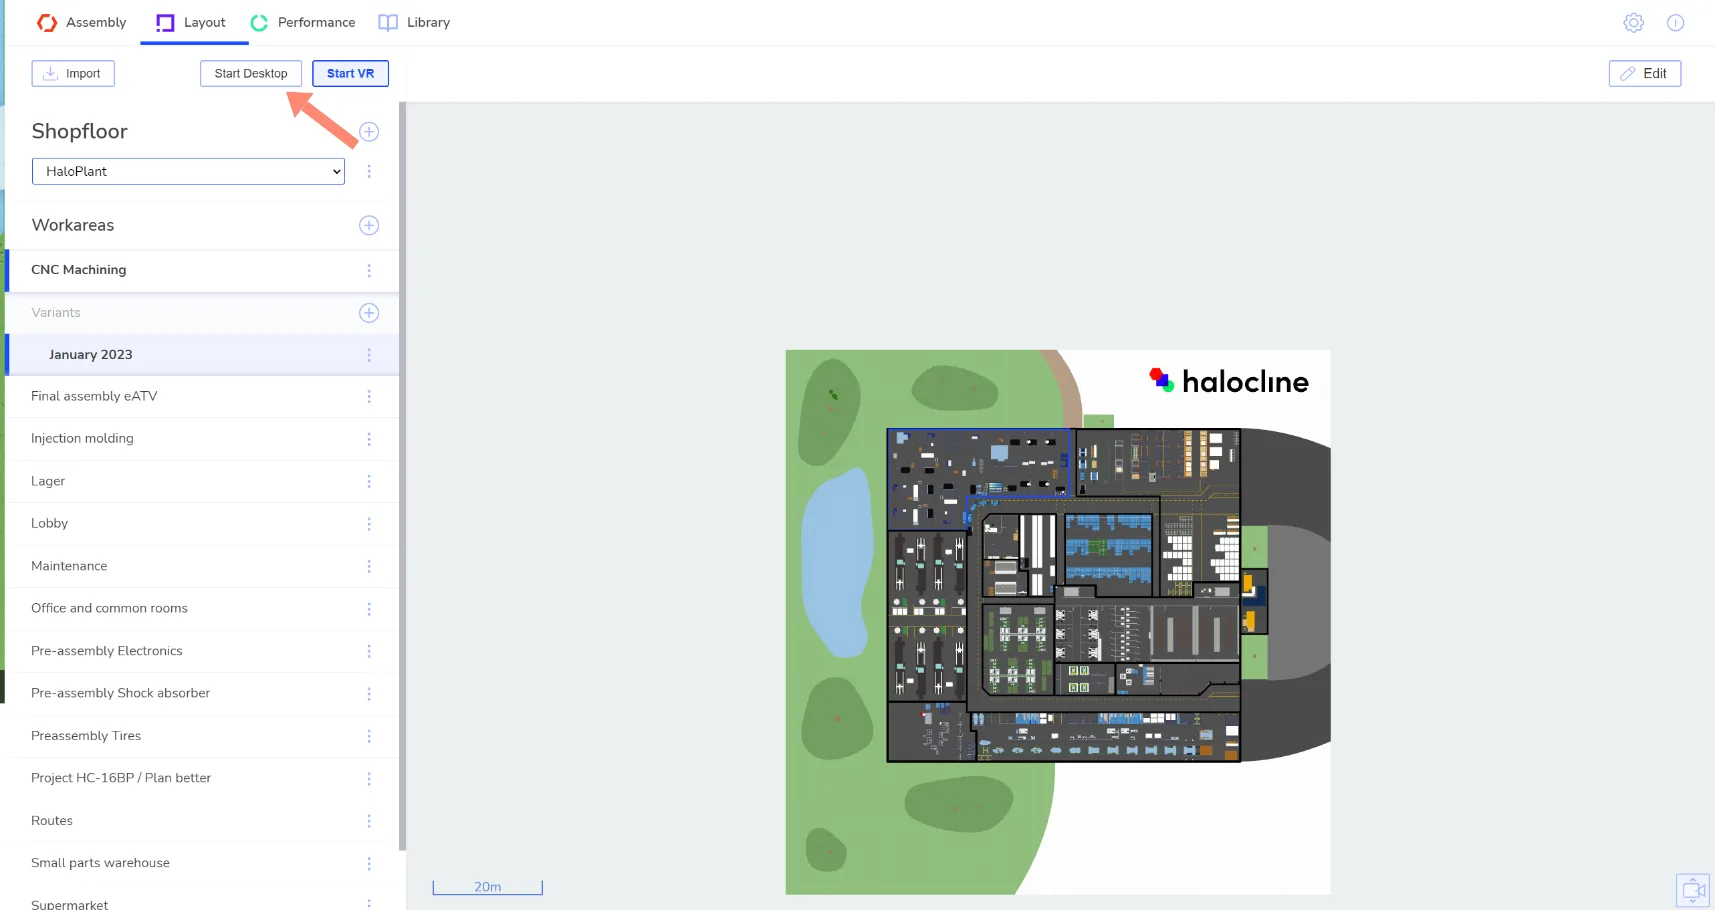
Start the mode in the layout tab with the “Start Desktop” button.
Overview of functions#
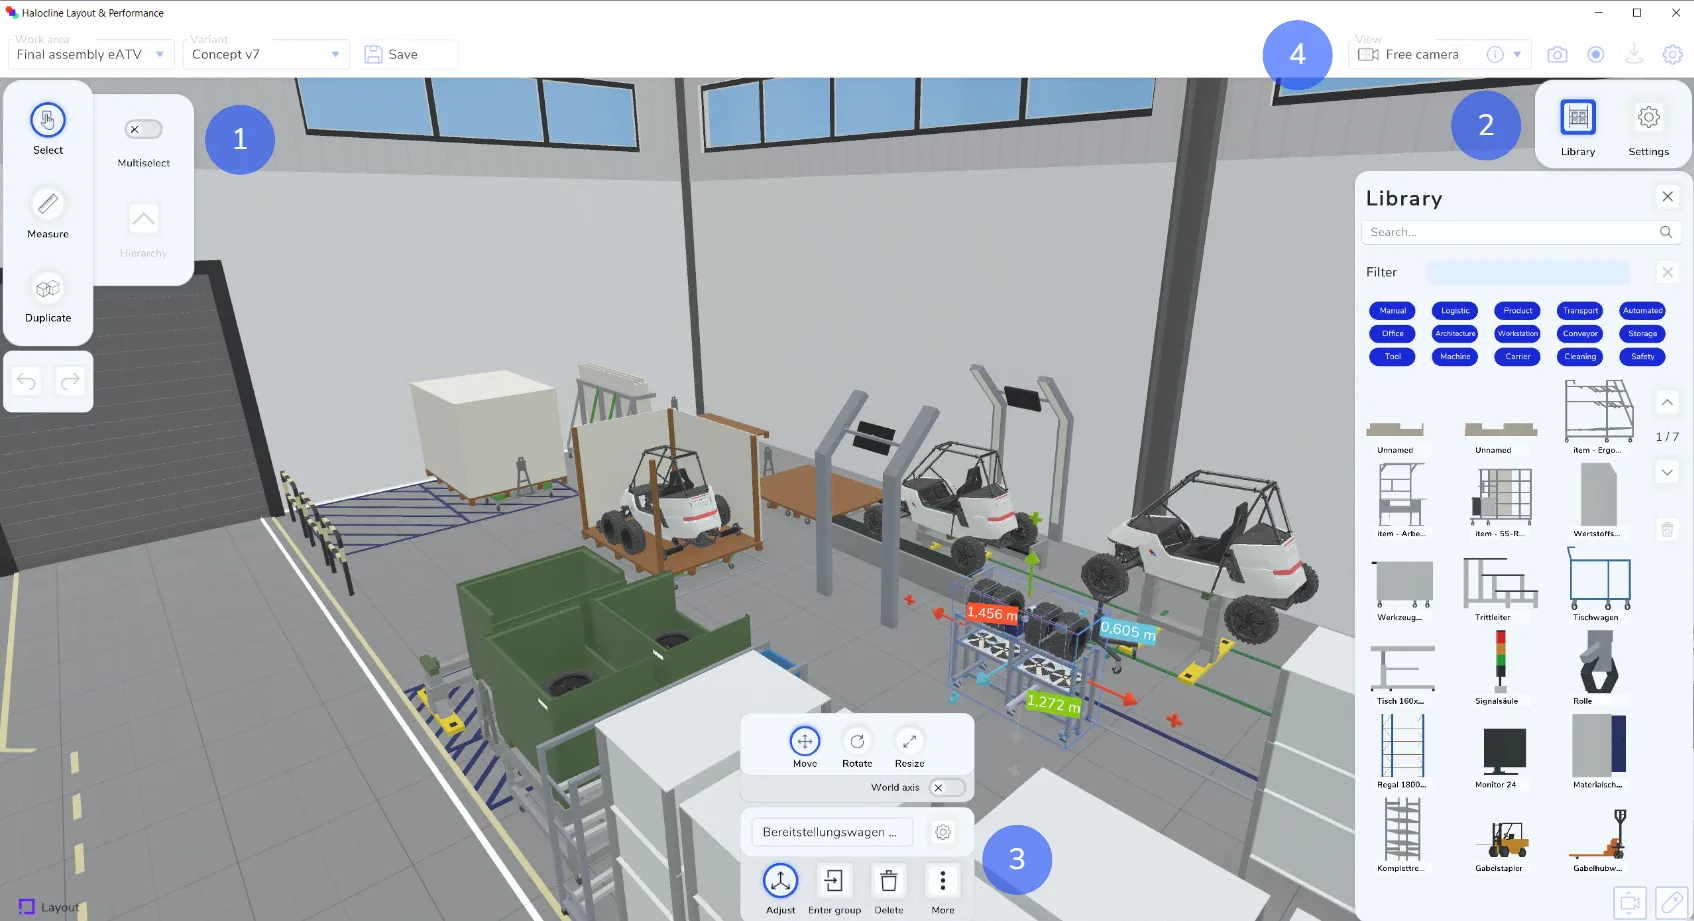
You can select various tools on the left-hand side of the screen (1).
At the top right you will find the settings and can open the library (2).
When you select an object, the context menu opens at the bottom of the screen (3). There you can, for example, name, color or move the object. You can find a description of the individual functions here.
Change the view from 3D (free camera) to 2D (top down) using the drop-down in the top bar (4).
Keyboard shortcuts#
Delete: entf
Undo: Strg + Z
Redo: Strg + Shift + Z
Copy: Strg + C
Paste: Strg + V
Rotate objects during positioning: R
Select Tool: V
Multiple selection: hold Shift
Measurement Tool: M
Cancel Measurements: esc
Camera controls#
Free Camera
Use the mouse wheel, the keyboard keys “W, A, S, D” or the arrow keys to fly straight ahead, left, right or back. Press the middle mouse button to move the image. When you scroll, you move the camera in the direction of your mouse cursor. Hold down the right mouse button to turn. You always rotate around the point of your layout that is in the center of the screen.
Use “Q” and “E” to move up or down.
Press the “Shift” key while flying to increase your speed and “Ctrl” to slow down.
Move: mouse wheel / W, A, S, D / arrow keys / Camera settings > arrows
Zoom: Scroll wheel/ Camera settings > plus & minus
Rotate: right mouse button
Camera height: Q, E
Speed: Shift, Strg
Focus selected object: F
Top down view
The top down view shows the shopfloor from above.
Hold down the right mouse button or the mouse wheel to move the image image area. Use the mouse wheel to make the area larger or smaller.
Rotate the view via camera settings at the bottom right, using the arrows on the left and right.
There you can also adjust the height of the camera if the ceiling or the pillars are in the way by moving the small camera at the bottom right or entering the desired height in the field.
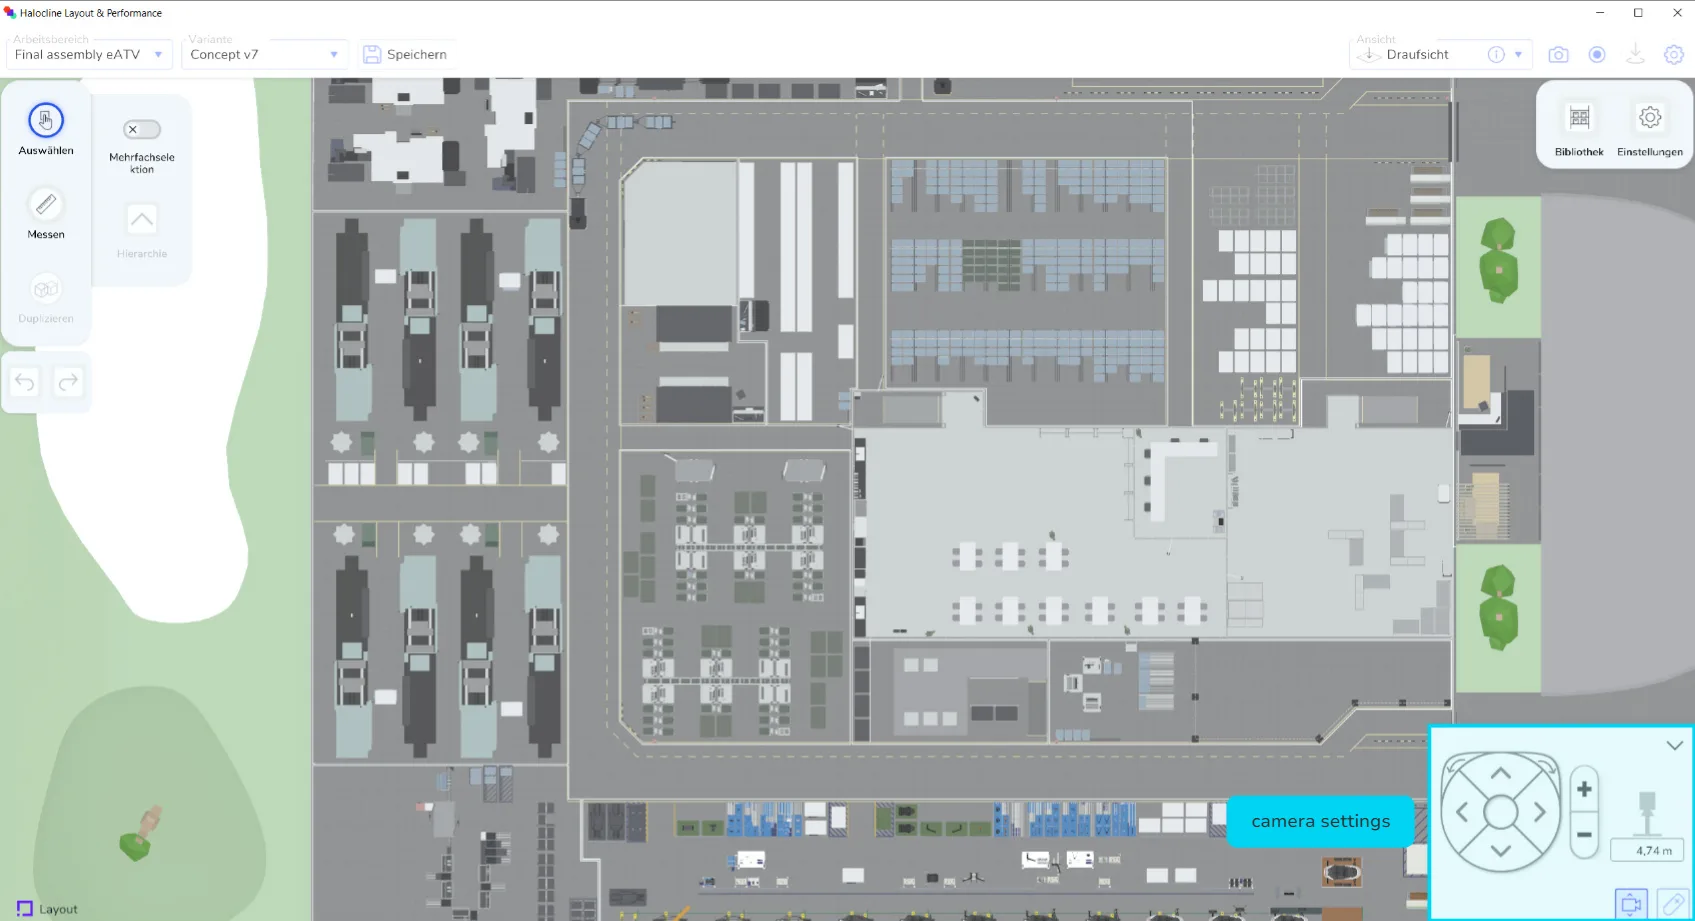
Move: right mouse button / camera settings > arrows
Zoom: scroll wheel / camera settings > plus & minus
Rotate: camera settings > arrows
Camera height: camera settings > input field