Importing and placing point clouds as 3D templates (Point clouds in VR)
2 min read
- Add-On Point Clouds
- Desktop
Importing point clouds into Halocline Layout allows you to view and recreate real environments as 3D templates. This guide explains the individual functions. You can find out more about the general procedure in the article Create objects from point clouds
Import#
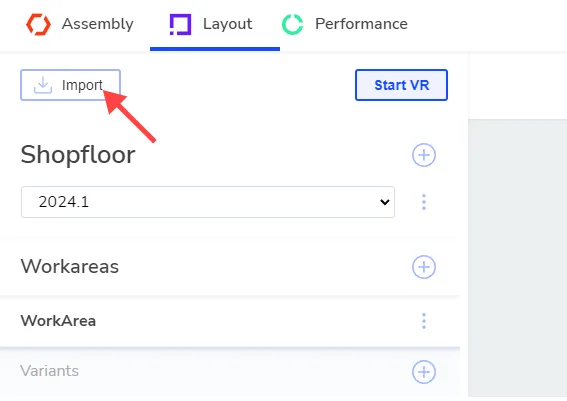
- Click on the import button in the top left of the layout tab.
- Select a point cloud in .pts format. Make sure that the file contains a maximum of 100 million points. If necessary, cut the point cloud into smaller parts before the import.
- Once the import is complete, start Layout VR to work with the point cloud.
Show Pointcloud#
- Navigate to the Beta tab in the menu and select "3D template".
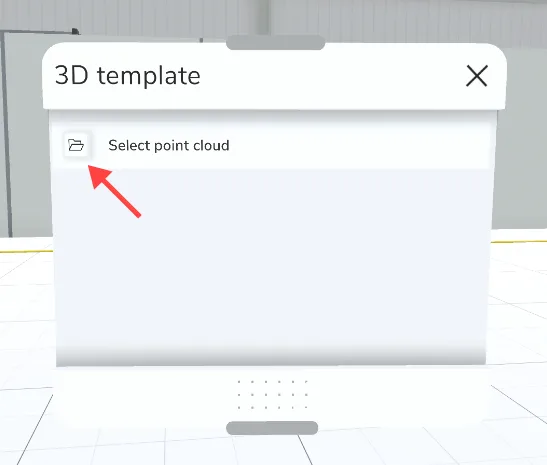
- Click on the folder icon in the open window to select your point cloud.
- Select your point cloud from the list. It will now be displayed in front of you in the room.
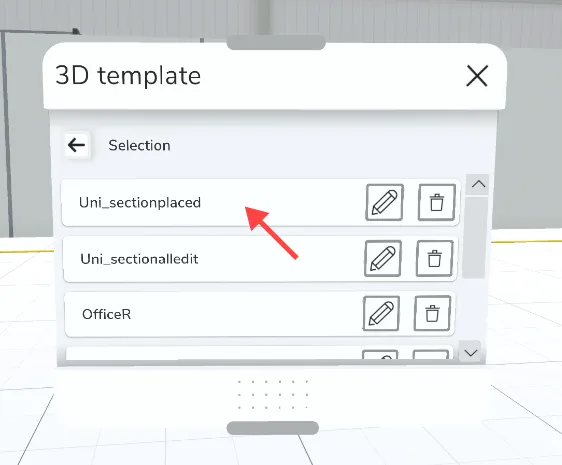
Note: If a point cloud is not displayed, it has already been placed in a different location. Click on place and teleport to the location indicated by the line.
Place & Save#
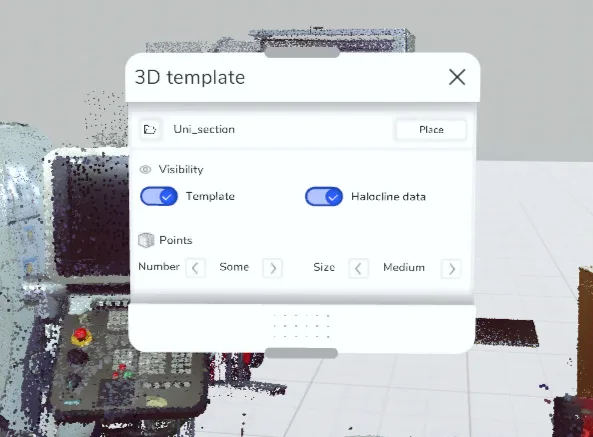
- Place: Click on the Place button to access the Adjust tool. This allows you to move and rotate the point cloud in virtual space.
- Save: Align the point cloud carefully in the store floor. As soon as you are happy with the positioning, click on "Save" in the window. The point cloud will now always be placed at these coordinates, regardless of which shopfloor you are on.
Adjust Level of Detail#
You have the option to choose between different views of the points:
- Number: Here you can choose how many points you would like to have displayed
- Size: Changes the size of the individual points.
Try out different combinations to find the optimal display for your point cloud and use case.
Hide#
To effectively recreate the point cloud, you can either hide the point cloud itself or certain Halocline objects. This allows you to make hidden geometries visible during construction.
Manage your Point Clouds#
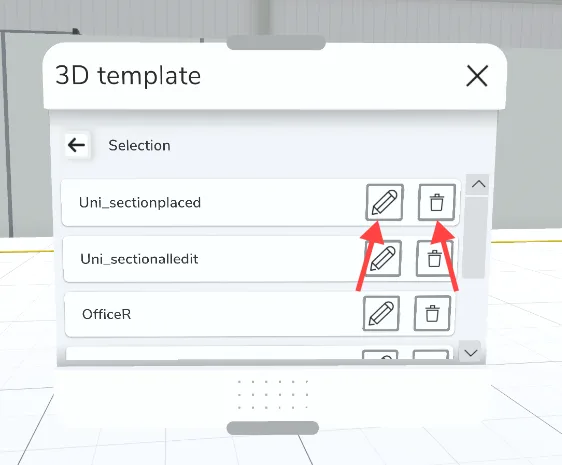
- Naming: In the list view, you have the option of renaming and deleting point clouds. For example, name the point clouds as the shopfloor in which you have placed them to keep a better overview.
- Delete: Mark point clouds that you no longer need for deletion. They will be permanently removed when you close the application.
Related to