Installing Pico VR Headsets
4 min read
If your Pico headset has not yet been connected to your computer, you first need to complete a few setup steps. After that, you can start Halocline.
The Pico 4 Ultra Enterprise and the Pico 4 Enterprise connect to the PC via the Pico software Business Streaming. It must be installed on both sides: as a desktop app on the PC and as an app in the headset. No user account is required.
Important: The PC app and the headset app must have the same version (currently 2.2.0, as of October 2026).
Requirements#
- PC/laptop: Windows 10 (22H2 or later) or Windows 11, with performance according to our system requirements. Integrated graphics are not suitable.
- Administrator rights: You need local administrator rights to install the software on your PC. Otherwise, please contact your IT department.
- Headset firmware: Business Streaming 2.2.0 is approved for PICO OS 5.13.x (Pico 4 Ultra Enterprise) and 5.9.9 (Pico 4 Enterprise). If necessary, update the firmware first.
- USB connection: USB 3.0 cable (USB-A on the PC, USB-C on the headset), about 4–5 m long. Use a USB 3.0 port on the PC (blue or marked with the "SS" logo), ideally directly on the motherboard.
- Wi-Fi connection: Gigabit router with a 5 GHz band. The PC is connected to the router via network cable (at least Cat 6), and the headset is on the same 5 GHz Wi-Fi network.
Installing Business Streaming on the PC#
- Open the Pico Business Streaming documentation.
- Scroll to the Application download link section and download the latest version for the PC (e.g. BusinessStreaming-v2.2.0-win32-x64.exe).
- Run the file as administrator and confirm the Windows security prompt.
- Follow the installation wizard and keep the default settings.
- Open Business Streaming from the Windows Start menu. On first launch, the app checks your PC (System Requirements Check). Confirm the Windows Firewall prompt with Allow access.
- The SteamVR notice only applies to SteamVR streaming and can be ignored.
Note: If an older version is already installed, simply install the new version over it. Uninstalling is not necessary.
Updating Business Streaming in the Headset#
Put on the headset and make sure it is connected to Wi-Fi.
- Open the PICO Browser in the menu bar at the bottom.
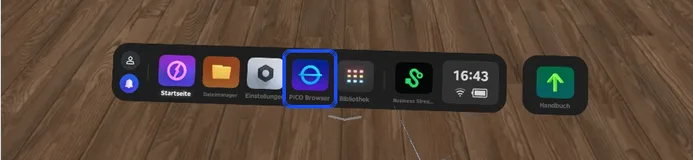
- Go to business.picoxr.com/de/doc/43j3qcoq and, under Download link – HMD, select the version matching your PC app (e.g. v2.2.0). The file is called BStreamingAssistantHMD…apk.
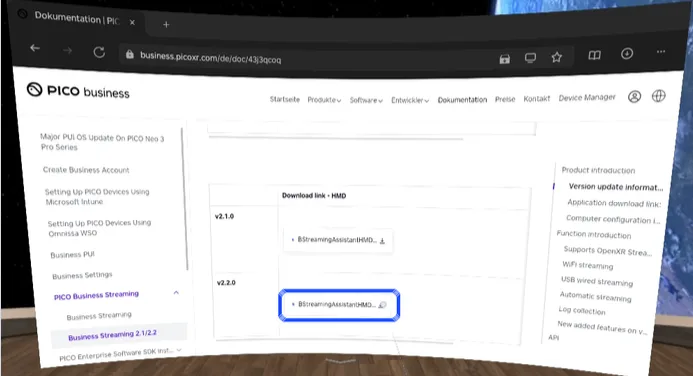
- When downloading for the first time, allow the browser storage access with Allow.
- In the Download file window, tap Download.
- Select the download icon in the top right of the browser and tap Open next to the file.
- Confirm the prompt "Do you want to install an update to this built-in app?" with Install. Your existing data will be kept.
You will then find the Business Streaming app in the menu bar (icon with a green "S") or in the library.
Establishing the Connection#
One-time setup: In the headset, go to Settings → General and turn off PC Connection Auto-Streaming.
On the PC:
- Start Business Streaming.
- Under Settings → General → Default Streaming Type, check that OpenXR Streaming is selected (default). The mode can only be changed before starting the stream.
- On the Devices page, choose USB or Wi-Fi under Select Connection Method and confirm with Confirm.
- Use AVC/H.264 or HEVC (H.265) as the video codec, not AV1.
In the headset:
- Connect the headset via USB cable, or make sure it is on the same 5 GHz Wi-Fi network as the PC.
- Start the Business Streaming app (green "S" in the menu bar).
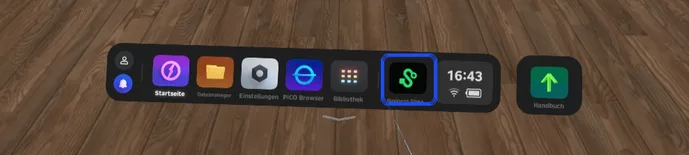
- Select your PC from the list and tap Connect. The screen may briefly go black. Wait about 5 seconds.
You can then start Halocline and begin your planning in VR.
Setup Tips#
-
Follow the start order
- First start Business Streaming on the PC, then connect the headset.
- Only then start a VR session in Halocline.
- To finish, close Halocline first, then disconnect in Business Streaming.
-
Connection cannot be established
- Check that the PC app and headset app have the same version. After headset firmware updates, the app version may change automatically.
-
Black screen or error message
- Restart the PC and headset and reconnect.
-
Stuttering or dropouts over Wi-Fi
- Move closer to the router, check the 5 GHz network, or switch to USB.
-
Halocline does not appear in the headset
- Check that OpenXR Streaming mode is selected.
- If you previously used another headset (e.g. Meta Quest or HTC VIVE), a different OpenXR runtime may still be active. Business Streaming shows the runtime in use and can reset it to the default with one click.
-
Home button does not respond during streaming
- Disable Home Button is active in the headset app. Press the Menu button and Y button on the left controller at the same time, then use the Home button.
-
Log file for support
- In the PC app, go to Help Center → Export Logs → Export to create a log file. It is saved to the desktop and includes headset logs when connected via USB.
- If this does not help, send us a request with the log file and name a contact from your IT department.