Planning a hall layout: from floor plan to agreed layout
3 min read
- Team
- Desktop
A mid-sized manufacturing company with approximately 500 employees faced the challenge of developing a new hall layout and making existing work areas more efficient.
The goal was to optimally structure the planned production area, improve material flows, and involve employees early in the process.
For the first planning steps, the team used Halocline Team to create a rough layout of the new production areas on a space of up to 1,000 m².
The planning could be implemented realistically, transparently, and in a structured manner—without the effort of traditional 2D layouts.
At the beginning, planning was dominated by 2D drawings that were difficult to understand.
Alignment took a long time, adjustments were error-prone, and employees could hardly imagine the spatial context.
For the redesign of the hall, the company looked for a tool that:
- enables planning at a 1:1 scale,
- simplifies coordination between planning, production, and management,
- makes changes quickly visible and verifiable.
With Halocline Team, the team found a solution that met these requirements—and was easy to use.
Approach#
Step 1: Import Floor Plan - Create the Planning Foundation#
As the first step, the existing hall floor plan was imported into Halocline.
This created a true-to-scale working environment on which all further planning steps were based.
Procedure in Halocline Team:
- Import floor plan file (e.g., DXF or image)
- Trace walls, columns, and gates based on the template
- Check scale and orientation
- Define zones for production, storage, and logistics
This resulted in a realistic digital representation of the hall—the foundation for all further planning steps.
→ More in the workflow: Layout Planning
Step 2: Create Rough Layout - Make Structures Visible#
Based on the floor plan, machines, shelves, and workstations were placed.
The object library in Halocline offered a variety of standard components that could easily be inserted via drag and drop.
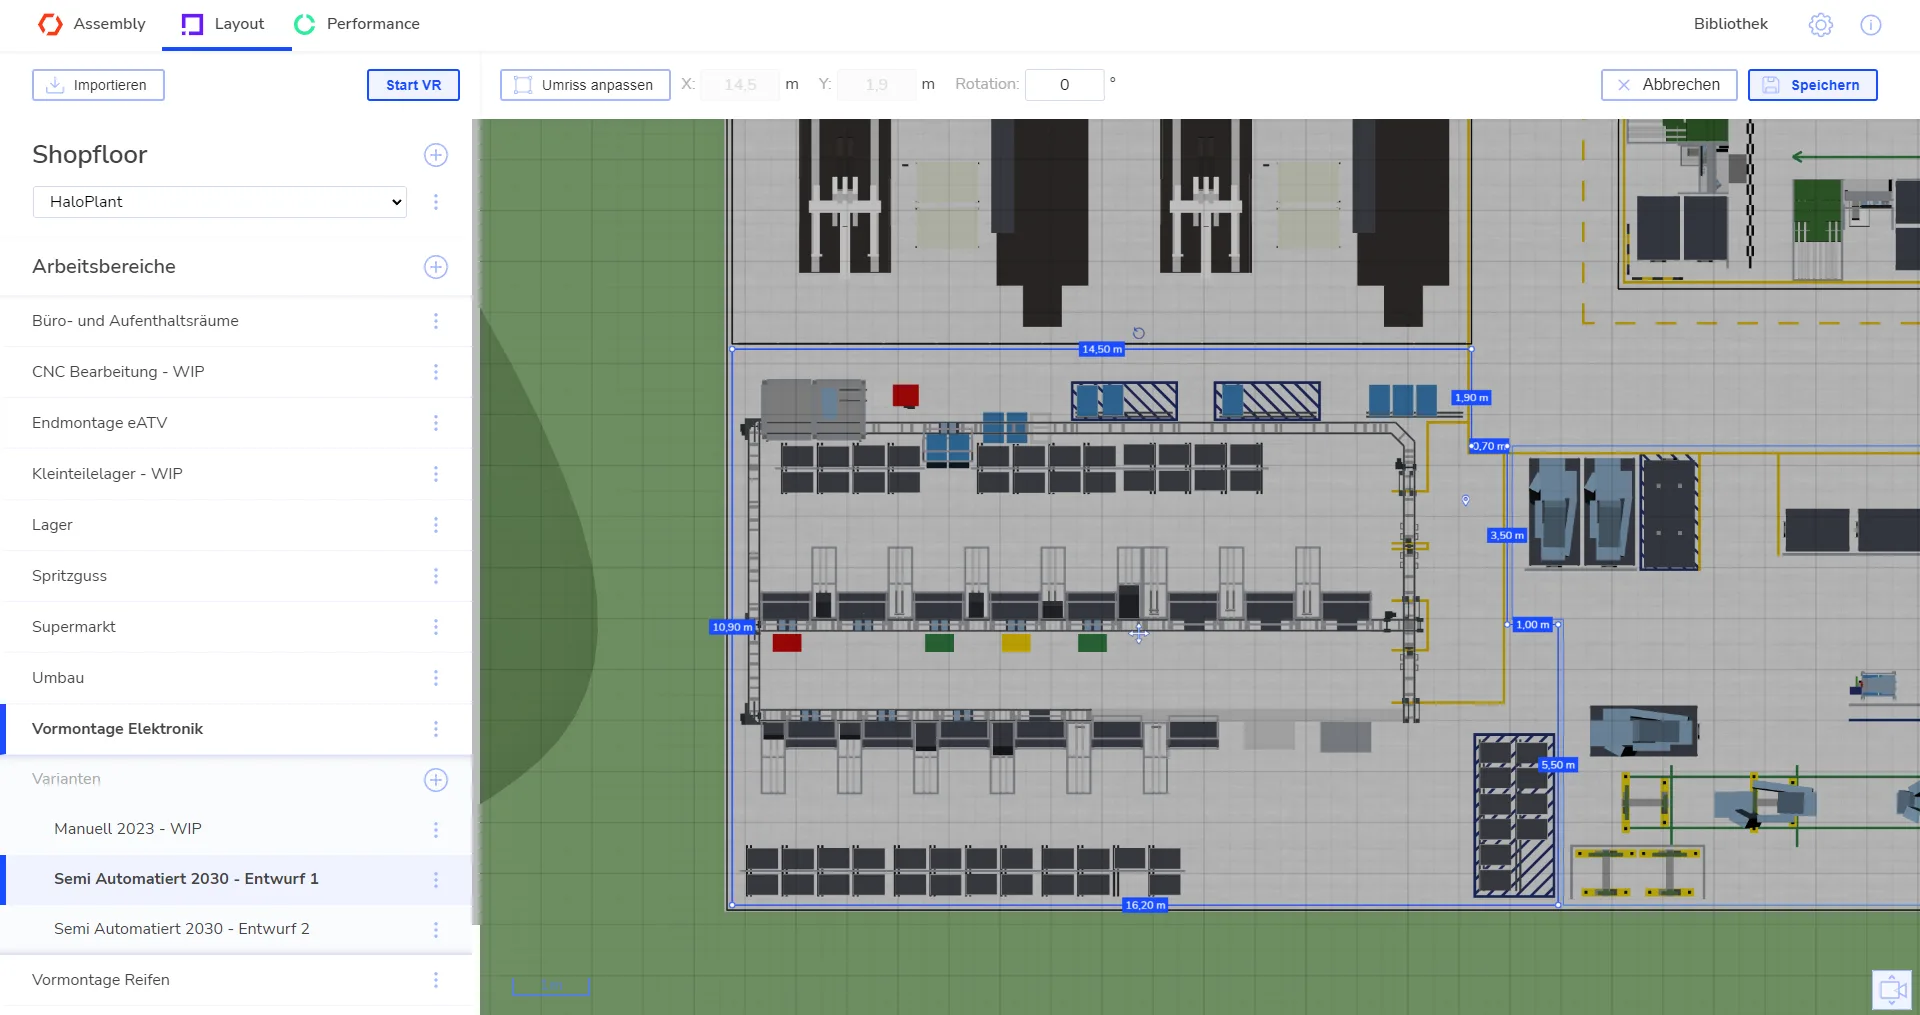
Important work steps:
- Position machine and assembly areas
- Mark traffic and material routes
- Separate work zones from one another
- Organize objects with labels and colors
This resulted in a functional rough layout that was used for initial alignment.
The team could clearly see where bottlenecks, overlapping paths, or unused areas appeared.
→ More in the workflow: From Rough to Detailed – From Desktop to VR
Step 3: Switch to 3D and VR - Review and Adjust Realistically#
After the rough layout was completed, it was opened in 3D and VR. This allowed spatial impact, distances, and routing to be reviewed realistically.
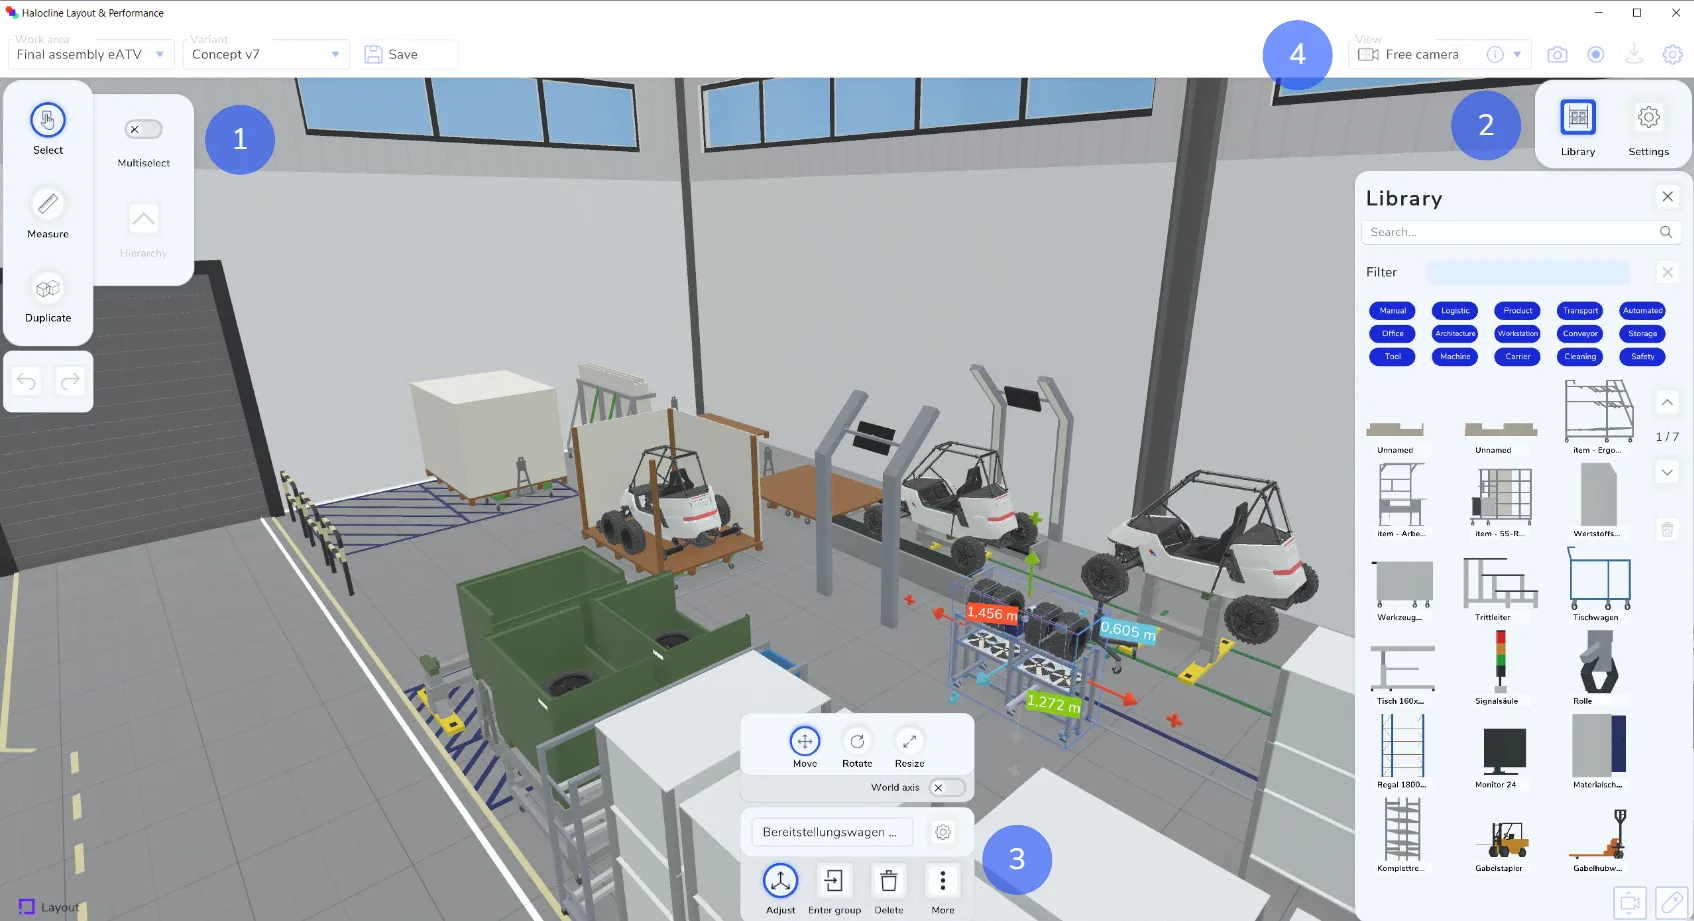
Typical work steps in Halocline Team:
- Activate 3D view and evaluate spatial perception
- Check distances and accessibility
- Move or adjust layout positions directly in VR
- Incorporate team feedback immediately
This made potential weaknesses visible early—for example, paths that were too narrow, unfavorable machine positions, or unclear material zones—and they could be corrected right away.
→ More in the workflow: From Rough to Detailed – From Desktop to VR
Step 4: Save and Document Layout - Secure the Planning#
With Halocline Team, projects could be saved, reopened, and continuously further developed.
Through iterative work in the 3D model, machine positions, material flows, and working distances were gradually optimized.
Important work steps:
- Implement changes directly in the 3D model
- Save and load planning stages
- Create screenshots and documentation for alignment
- Use final version as a communication basis
- Export to 2D as PDF or in 3D as STEP file
The result was an aligned, realistic layout that could be used both internally and externally—for example, for suppliers or management decisions.
→ More in the workflow: Share Results
Results and Added Value#
Through structured work with Halocline Team, the company was able to:
- significantly reduce planning time,
- accelerate alignment and avoid misunderstandings,
- make layout changes immediately visible and verifiable,
- actively involve employees in the design process,
- create a reliable, documented final layout.
The result was a transparent, realistic, and participatory planning process that made production start-up more efficient and safer.
Errors that otherwise would have become visible only during implementation could be resolved already in the planning phase.
In Short#
The approach shown here can be fully implemented with Halocline Team. What each plan includes is on the pricing page.
Related to